Adding Remote Desktop Services and RemoteApp programs
There are factors that solutions providers need to consider when adding Remote Desktop Services, such as which role services to use, and steps to follow to add RemoteApp programs.
Solutions provider takeaway: Adding Remote Desktop Services can be complex for solutions providers, but this chapter excerpt explains what to look for, including which role services to use and what you should know about application compatibility. Find out the steps you need to follow to properly add RemoteApp programs.
|
||||
Adding Remote Desktop Services
You can add the Remote Desktop Services role to any Windows Server 2008 R2 server using Server Manager. Server Manager includes wizards that allow you to add many roles, and you've probably already used it by now.
When adding the RDS role, you'll be prompted to answer some questions. The following sections will give you the knowledge you need to answer these questions and successfully add the role. Some of the topics related to an RD Session Host server installation include the following:
- Additional role services
- Network Level Authentication
- Licensing mode
- Local Remote Desktop Users group membership
- Adding applications
After the role is installed, you'll need to take some steps to configure the server. This section will guide you through the decision-making process and the steps to add and configure the server.
Remote Desktop Services Not Needed for Administrator Connections
Remote Desktop Services is not needed to connect to a server for administrator connections. Chapter 14 covered remotely connecting to a server using Remote Desktop Connection (RDC) or Remote Desktops. To use these tools, you don't need to install Remote Desktop Services. Instead, you only need to enable Remote Desktop connections on the server.
A significant difference between remotely connecting for administrator purposes and using an RD Session Host server is that licenses aren't needed for administrator connections. Any server can support as many as two remote administrator connections without a license. However, licenses are required for RD Session Host server connections on one-to-one basis. In other words, you'll need a license for every connection.
Required Role Services
Remote Desktop Services is a server role and includes several role services. All of the services aren't required for every installation. You'll need to evaluate what you're trying to accomplish to determine which services to add.
Remote Desktop Session Host The RD Session Host service enables the server to host Windows-based programs or a full Windows desktop. This is a required service for the role.
Remote Desktop Virtualization Host The RD Virtualization Host service is integrated with Hyper-V to allow users to connect to a virtual machine on a server hosting Hyper-V. It can be configured so that users will connect to their own unique virtual machine and allow users to run multiple operating systems simultaneously. This service requires the Hyper-V role service and is needed if you are using the Hyper-V role service.
Remote Desktop Licensing The RD Licensing service manages the client access licenses (RDS CALs) that are needed to connect to an RD Session Host server. It's possible to run Remote Desktop Services without licenses for a limited grace period of 120 days. This allows you to deploy, configure, and test the server.
Remote Desktop Connection Broker The RD Connection Broker service is used for session load balancing and session reconnection in an RD Session Host server farm. It's also required to support RDS RemoteApp applications that allow users to launch applications on the RD Session Host server via Internet Explorer.
If you are using multiple RD Session Host servers, the RD Connection Broker can redirect connections to the servers that are the least busy, which provides load balancing. Additionally, if a user is disconnected, the RD Connection Broker will ensure they are reconnected to the same server where their session is active.
Remote Desktop Gateway The RD Gateway service is used to allow users to connect to RD Session Host servers and remote desktops over the Internet. This service requires additional role services including the Web Server (IIS), Network Policy and Access Services, RPC over HTTP Proxy, and the Remote Server Administration Tools.
Remote Desktop Gateway was covered in much greater depth in Chapter 14, including how to add the required services and enable it.
Remote Desktop Web Access The RD Web Access service allows users to access RemoteApp and Remote Desktop Connection through a web browser. If the clients are running Windows 7, they can access these through the Start menu on their system. This service requires additional supporting role services including Web Server (IIS) and Remote Server Administration Tools. IIS is short for Microsoft's Internet Information Services.
Application Compatibility
If you plan on using the RD Session Host server to host applications for end users, you should install it first before installing the applications. Applications that are installed before adding the RD Session Host role may not work correctly in a multiple user environment.
Although some applications will work in multiuser mode even if they've already been installed, many will not. If you've already installed applications that you want to use with RD Session Host server, you should consider uninstalling the application before adding the Remote Desktop Services role.
Easy Print
A neat new feature available since Windows Server 2008 is called Easy Print. Easy Print ensures that client printers are always installed in remote sessions without requiring printer drivers to be installed on the terminal server.
This might not seem like much, but in the past, you were required to install printer drivers on the terminal server for all the printers used by clients. If you have just 50 clients and they were using 10 different print devices, you'd then need to install printer drivers for all 10 print devices on the server even if they were already installed on the client's systems.
Now you may wondering what you need to do to support Easy Print. Almost nothing. The support is there automatically as long as Remote Desktop Services is installed on Server 2008 R2 (or Terminal Services is installed on Windows Server 2008).
Clients need to be running RDC 6.1 and the Microsoft .NET Framework 3.0 with SP1. RDC 6.1 is backward compatible to XP SP3 with a download, as mentioned earlier. Microsoft .NET Framework 3.0 with SP1 is available for download for XP clients from Microsoft's download site: www.microsoft.com/downloads. Search for Microsoft .NET Framework 3.0 Service Pack 1.
Single Sign-On
Single sign-on is when users are able to provide their credentials once and these credentials are used for the entire session. As long as these credentials have adequate permissions, the user isn't asked to provide their credentials again. Without single sign-on, users can be queried several times to provide the same username and password.
You can implement single-sign for clients that access the RDS server using Windows XP SP3, Windows Vista, and Windows 7 clients or from Windows Server 2008 or 2008 R2 servers.
Two settings are required in the RDP TCP/IP Connection properties. You'll see graphics of these later, but here are the two settings:
- Ensure that the Security layer is set to either Negotiate or SSL (TLS 1.0) on the General tab of the RDP TCP/IP Connection properties.
- Ensure that "Always prompt for password" is not selected in the "Log on" settings of the RDP TCP/IP Connection properties.
Network Level Authentication
Network Level Authentication (NLA) can be used in Remote Desktop sessions to provide better security. When adding the Remote Desktop Services role, you need to specify whether NLA is required. Your decision is based on the clients the RD Session Host server will support.
NLA ensures that the authentication is completed before a full Remote Desktop connection is established. Without NLA, there is a small window of opportunity for a malicious user or malicious software to attack, even if authentication is unsuccessful.
NLA is available by default in Windows Vista and Windows 7. It relies on the Credential Security Service Provider (CredSSP). If all the clients are running Windows Vista or Windows 7, then you should require Network Level Authentication on the RD Session Host server.
Windows XP doesn't natively support NLA. However, if you upgrade to SP3 and enable CredSSP, you can use NLA. You need to modify the registry to use CredSSP in Windows XP SP3. Check out these two Microsoft Knowledge Base articles for more information:
- KB article 951608, Description of the Credential Security Service Provider (CredSSP) in Windows XP Service Pack 3: http://support.microsoft.com/kb/951608/
- KB article 951616, Description of the Remote Desktop Connection 6.1 client update for Terminal Services: http://support.microsoft.com/kb/951616
If your clients are older than Windows XP SP3, they cannot use NLA, and NLA should not be required. The older clients will not be able to connect using NLA.
Licensing Mode
You'll be prompted to select the licensing mode when you add the Remote Desktop Services role. The licensing mode specifies what type of Remote Desktop Services Client Access Licenses (RDS CALs) you'll use. You have three choices:
Configure Later You can postpone your decision and simply select Configure Later. You'll have a grace period of 120 days to configure licensing and select a licensing mode. It's common to choose this option early in the deployment cycle and then configure the RDS CALs once you've worked out the kinks in your RD environment.
Per Device A per-device CAL is issued to a client computer or device. If the licensing mode is set to Per Device and a licensing server has been configured, the licensing server will issue the device a temporary license the first time the device connects. The second time the device connects, the licensing server will attempt to issue it a permanent license.
The licensing server will enforce per-device CALs. In other words, if a per-device CAL doesn't exist for the device and an RDS CAL isn't available to be issued, the connection will be blocked.
You should use per-device CALs if multiple users will use the same device to connect to an RD Session Host server.
Per User A per-user CAL allows a user to connect to an RD Session Host server from any number of devices. Interestingly, the license server doesn't track the per-user CALs. This can make things both easier and more difficult. It's easier to manage on a day-to-day basis because the RD Session host server won't stop users from connecting. However, administrators still have a responsibility to ensure that appropriate CALs have been purchased, which does take some extra administration.
It is possible to configure the maximum connections supported by the server to coincide with the number of purchased CALs. This is done on the Network Adapter page of the RDP-Tcp Properties in the Remote Desktop Session Hosts Configuration console. This isn't exact since users can legitimately connect to more than one session at a time unless you've limited users to only a single connection at a time.
You should use a per-user CAL if users will connect to an RD Session Host server from multiple devices.
A Remote Desktop Services Licensing server needs to be configured to install, issue, and track RDS CALs. Clients won't be able to connect to the RD Session Host server if RDS CALs haven't been purchased and added to the licensing server before the grace period.
Remote Desktop Users Group
Users need to be members of the local Remote Desktop Users group in order to connect to the RS Session Host server. You can add them when you add the role or add them later. The Administrators group is added to the Remote Desktop Users group by default.
Two Remote Desktop Users groups exist: one in the domain and a local group on the RD Session Host server. You need to add users and groups into the local group to grant access for them to connect.
It's not uncommon for an administrator to incorrectly add users to the domain Remote Desktop Users group thinking this will grant access to the RD Session Host server. After a little bit of head banging or hair pulling, the little word local is noticed. Once users are added to the local group, things work just as advertised.
Adding the Remote Desktop Services Role
You can use the following steps to install Remote Desktop Services. A word of warning, though: you really need to install this on a computer that isn't a domain controller. In our example environment, we're using one server as a DC (named BF1) and another server as the RDS server (named BF2) in a domain named bigfirm.com. If you try install RDS on a DC, you'll receive a couple of warnings and later realize some things just can't work. For example, you'll need to manipulate local groups, but local groups don't exist on a DC.
- Log onto a member server.
- If Server Manager doesn't launch automatically, launch it by selecting Start ⇒ Administrative Tools ⇒ Server Manager.
- In Server Manager, select Roles, and click the Add Roles link.
- If the Before You Begin page appears, review the information, and click Next.
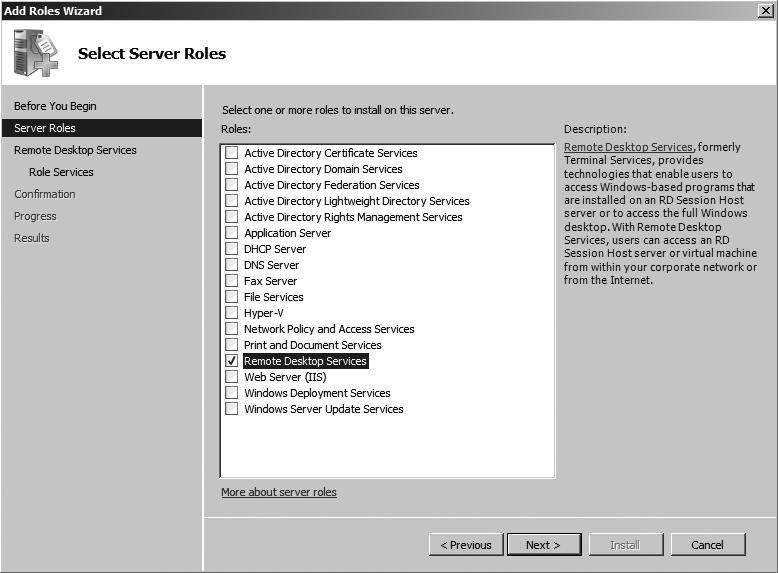
- Select the Remote Desktop Services role. Your display will look similar to Figure 25.2. Click Next.
-
Figure 25.2
Adding the Remote Desktop Services role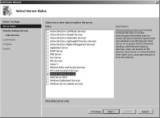
- Review the information on the Introduction to Remote Desktop Services page, and click Next.
- On the Select Role Services page, select the check boxes for Remote Desktop Session Host, Remote Desktop Licensing, Remote Desktop Connection Broker, and Remote Desktop Web Access. When you select the check box for Remote Desktop Web Access, a dialog box will appear similar to Figure 25.3. Click the Add Required Role Services button, and click Next.
- Review the information on the Applications for Compatibility page. Click Next.
- Review the information on the Authentication Method page, and select Require Network Level Authentication if your clients are running at least Windows Vista or Windows XP SP3 with the registry modification to enable CredSSP. Select Do Not Require NetworkLevel Authentication if the clients are older. Click Next.
- On the Specify Licensing Mode page, select Configure Later, and click Next.
- The User Groups page will appear and includes the Administrators group. You can add users or groups using this page, and they will automatically be added to the local Remote Desktop Users group. Click Next.
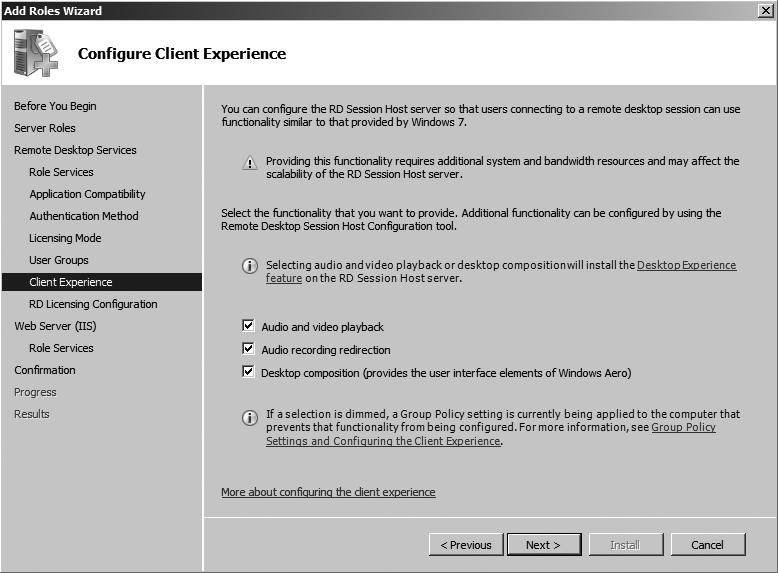
- The Configure Client Experience page will appear, as shown in Figure 25.4. If clients are running Windows 7, you can use this page to enable additional functionality that mimics Windows 7. Select the check boxes for each to install the Desktop Experience feature on the server. It can be disabled later if desired. Click Next.
-
Figure 25.3
Adding required role services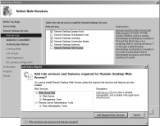
Figure 25.4
Configuring the client experience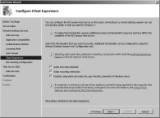
- Review the information on the RD Licensing Configuration page. Leave the check box deselected so that discovery scope is not configured for the license server. Click Next.
- The Web Server (IIS) installation will begin. As a reminder, this is required to support Remote Desktop Web Access. Review the information on the Web Server (IIS) page, and click Next.
- The Role Services page will show with the required role services already selected. Review the selected services, and click Next.
- Review the information on the Confirmation page. A warning stating you may need to reinstall existing applications is normal. It's just reiterating that applications installed before Remote Desktop Services is installed may not work in multiuser mode unless they are reinstalled. Click Install.
- The installation will take several minutes to complete. When it completes, the Installation page will appear indicating a restart is pending. Click Close. When prompted to restart the server, click Yes. The installation will continue during the restart process. This may take several minutes to complete, so feel free to take a cappuccino break.
- After the system reboots, log on using the same account, and the configuration wizard will resume. When the installation completes, review the information in the Installation Results page, and click Close.

It's normal to get informational messages related to the Remote Desktop Services Server License server since it has not been configured yet. Additionally, you'll see a warning indicating that RD Web Access requires additional configuration, which is covered later in this chapter.
Adding Applications
Although many applications will work automatically in multiuser mode (such as Paint, Calculator, and Notepad), other applications need to be installed. Previous versions of Remote Desktop Services (called Terminal Services) required extra steps to install the applications, but the process is much simpler with RDS.
After the role has been added, you can install any application using an .msi (Windows Installer) file or via the Control Panel's Add Remove Programs Wizard. If the application will install via one of these methods, that's all that's necessary.
However, if you have a legacy application that won't install via one of these methods, you'll need to use the Change User command. The three-step process is as follows:
- Execute the Change User /install command from the command prompt. This puts the RDS server into installation mode.
- Install the application.
- Execute the Change User /execute command from the command prompt. This returns the RDS server to the normal mode of operation.
Connecting to an RDS Session
After adding the RDS role, clients that are members of the local Remote Desktop Users group can access desktop sessions on the RD Session Host server. During the installation, you had an opportunity to add users and groups to the Remote Desktop Users group, and you may have done so. Members of the administrators are automatically in the group and can't be removed.
Use the following steps to add a user or group into the local Remote Desktop Users group and verify the RDS server supports remote sessions:
- Log onto the RD Session Host server.
- If Server Manager doesn't launch automatically, launch it by selecting Start ⇒ Administrative Tools ⇒ Server Manager.
- Browse to the Configuration\Local Users and Groups\Groups node.
- Double-click the Remote Desktop Users group. Add a user or group from the domain that you'll use to test connectivity. In Bigfirm.com, two users (Joe and Sally) are added, as shown in Figure 25.5. Add any users on your system that you want to be able to access the RD Session Host server. Click OK.
-
Figure 25.5
Adding users to the local Remote Desktop Users group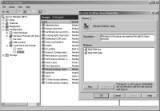
- Click Start, type MSTSC in the Search box, and press Enter. This will launch the Remote Desktop Connection console. For a full description of all the options available in this tool, you can check out Chapter 14.
- Click the Options button. Enter the name of the computer hosting RDS in the Computer box, and enter the username of a user in the local Remote Desktop Users group. Your display will look similar to Figure 25.6. Click Connect.
-
Figure 25.6
Connecting with Remote Desktop Connection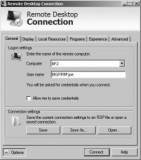
- A Windows Security screen will appear, and you will be prompted to enter the password for the user. Enter the password, and click OK. Security will be negotiated, and after a moment, you will be connected to the desktop.
- Depending on how MSTSC was configured, the connection may start as a window on the desktop or in full-screen mode. Figure 25.7 shows the connection. Notice it has a Windows 7 look and feel.

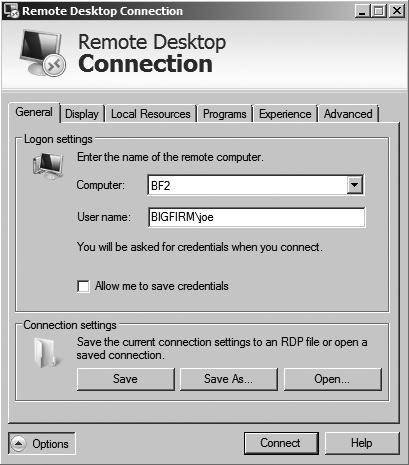
Figure 25.7
Connected to the RD Session Host server using Remote Desktop Connection

Although this verifies that you have successfully installed RDS and can connect to RDS sessions, the sessions are still plain desktops. You can install applications on the RD Session Host server and make them available to all users, or you can use RD RemoteApp applications to allow users to run the applications in Windows on their desktops.
Adding an RDS RemoteApp Application
Remote Desktop RemoteApp applications are a neat feature with RDS. Once added and configured, they will run in their own window on the end user's computer. Instead of a user launching a full desktop of another operating system, the RemoteApp application appears just like another application.
Another neat feature is that you can restrict access to the RemoteApp programs by identifying which users and groups can access the program. By default, all authenticated domain users will have access.
There are a lot of steps to get RemoteApp applications to work, but hang in there. None of the steps are that difficult by themselves. As an overview, the following steps need to be taken and are included in this section:
- Add an RDS RemoteApp program to the RDS server.
- Add the RDS server to the TS Web Access Computers group.
- Configure your RD Session Host server to serve RD RemoteApp applications.
- Identify your RDS server as an RD RemoteApp source.
You'll then be able to launch RD Remote Applications using Internet Explorer from any system in your network.
Adding RemoteApp Programs
Use the following steps to add one or more programs to the RemoteApp program list:
- Launch the RemoteApp Manager by selecting Start ⇒ Administrative Tools ⇒ Remote Desktop Services ⇒ RemoteApp Manager.
- The Actions pane on the right includes a link to Add RemoteApp Programs. Click this link.
- Review the information on the Welcome page, and click Next.
- The RemoteApp Wizard displays a list of programs that are currently installed on the server and can be added to the RemoteApp Programs list. Select the check box for Paint and any other programs you may want to add. You can also click Browse, and browse to other executable programs on your system that don't show in this list.
- Click Properties. Select the User Assignment tab. Your display will look similar to Figure 25.8. Notice you can restrict access to programs to specific users and groups here.
-
Figure 25.8
Adding programs to the RemoteApp Programs list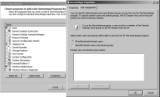
- Click OK to dismiss the RemoteApp properties sheet. Click Next on the program selection list page.
- Review your choices on the Review Settings page, and click Finish.

Adding an RDS Server to the TS Web Access Computers Group
These next steps will add your RDS server to the TS Web Access Computers group:
- Launch Server Manager by selecting Start ⇒ Administrative Tools ⇒ Server Manager.
- Browse to the Configuration\Local Users and Groups\Groups node.
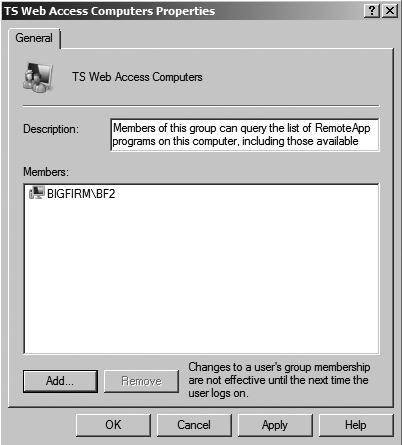
- Double-click the TS Web Access Computers group, and click Add.
- In the Active Directory search page, click Object Types.
- Select the check box next to Computers to include computers in the search. Click OK.
- Type in the name of the computer hosting RDS, and click OK. Your display should look similar to Figure 25.9. Click OK.
Figure 25.9
Adding the computer to the TS Web Access Computers group
Configuring the RDS Server to serve RD RemoteApp Applications
With the RDS server added to the TS Web Access Computers group, you can now configure the RD Session Host server to serve the RD RemoteApp applications via a web browser.
- Launch the Remote Desktop Web Access Configuration console by selecting Start ⇒ Administrative Tools ⇒ Remote Desktop Services ⇒ Remote Desktop Web Access Configuration. This will launch Internet Explorer with the address of the RD web server.
- Unless you've added a certificate from a trusted authority, you will receive an error indicating there is a problem with the website's security certificate. This is normal. The certificate is self-signed, which is good enough for a test environment, but you'll want to install a certificate from a trusted certificate authority for a production server. Click "Continue to this website (not recommended)."
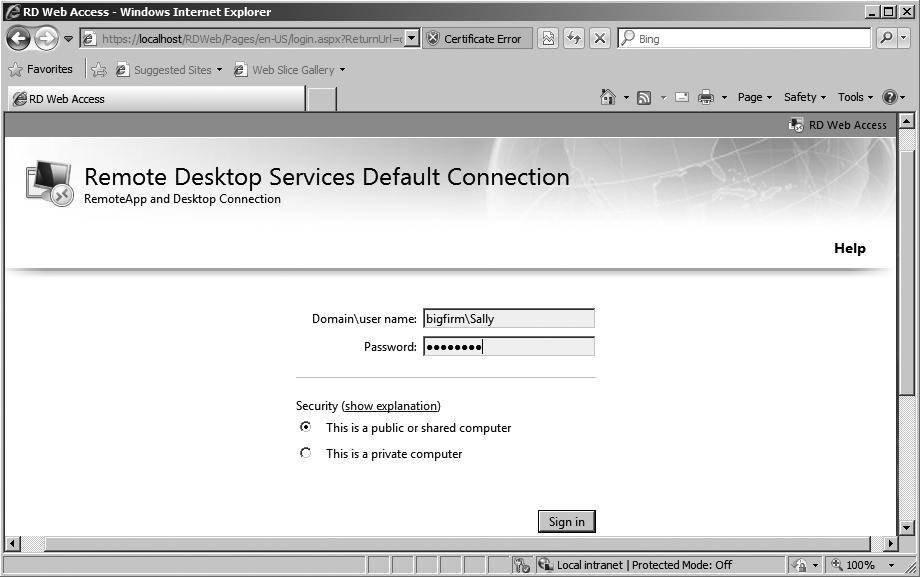
- After a moment, the Remote Desktop Services Default Connection page will appear. Enter the domain and username for an administrator account and the associated password. Your display will look similar to Figure 25.10. Click the Sign In button.
-
Figure 25.10
Remote Desktop Services Default Connection page
- If you followed the steps in this chapter to install RDS, you included the Remote Desktop Connection Broker as one of the role services installed on the server. This will be the source for your RemoteApp programs. Select An RD Connection Broker Server, as shown in Figure 25.11. Click OK.
-
Figure 25.11
Configuring RD Connection Broker server as the source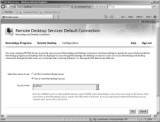
- At this point, Remote Desktop Web Access is configured, and the Enterprise Remote Access web page will appear with the RemoteApp Programs selected. However, the list is empty.

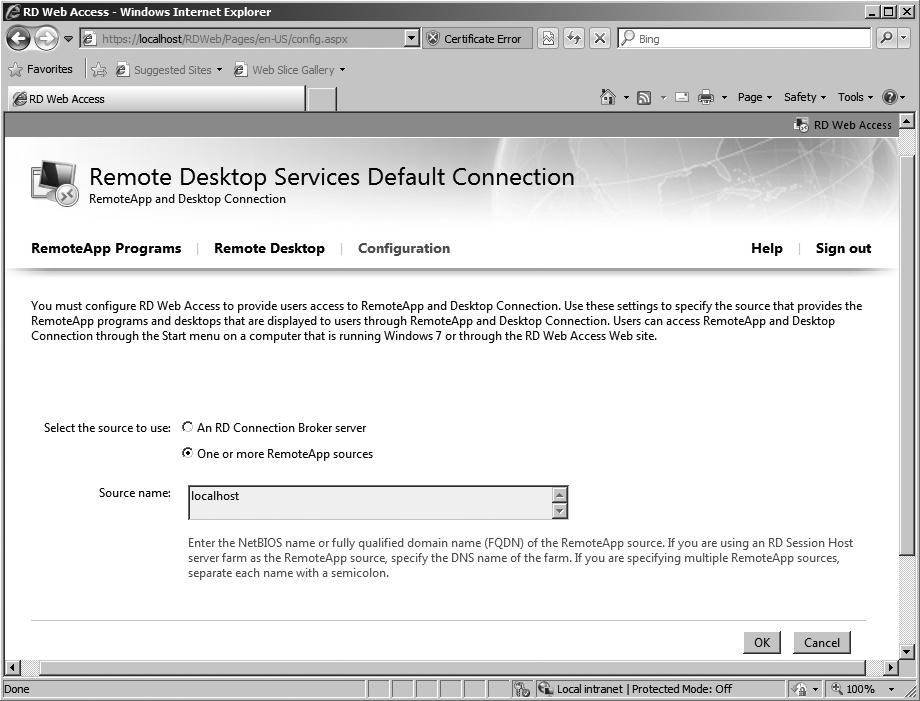
Even though you added several RemoteApp programs previously, none of them appears because the server hasn't been identified as a RemoteApp source. It's time to do that now.
Adding an RDS Server as a RemoteApp Source
You'll now add your RDS server as a RemoteApp source:
- Launch the Remote Desktop Connection Manager by selecting Start ⇒ Administrative Tools ⇒ Remote Desktop Services ⇒ Remote Desktop Connection Manager.
- Select RemoteApp Sources in the navigation tree pane on the left, and then click Add RemoteApp Source in the Actions pane on the right.
- Enter the name of the server where you've installed RDS. Your display should look similar to Figure 25.12. Click Add.
-
Figure 25.12
Using Remote Desktop Connection Manager to add a RemoteApp source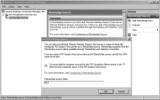
- Your server will appear as one of the RemoteApp sources. Close the Remote Desktop Connection Manager.

Launching a RemoteApp from Internet Explorer
Launch a RemoteApp from Internet Explorer with the following steps. You can do this from your RDS server, or if desired, you can do it from another computer in your network.
- Launch Internet Explorer.
- Enter the following URL into the address bar: https://localhost/rdweb.
- If you're accessing this from a remote host, enter the name of the server in place of localhost. For example, our server name is BF2, so we would enter it as https://bf2/rdweb.
- Since the server is using a self-signed certificate, you'll see an error. Click the Continue to This Website (Not Recommended) link.
- If prompted by the Internet Explorer Enhanced Security Configuration, click Add to indicate you trust this website. Click Add again, and click Close.
- The RemoteApp and Desktop Connection page will appear.
- Enter a username in the format of domain\user name and a password for an account that is in the local Remote Desktop Users group of the RDS server. We've created an account named Sally in the Bigfirm.com domain, so we have entered it as bigfirm\Sally, as shown in Figure 25.13.
-
<
Figure 25.13
Logging into the Enterprise Remote Access website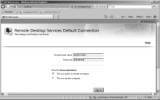
Notice that you can also select whether you're accessing the RemoteApps from a public or private computer. The private setting allows a longer period of activity before logging you off. It's strongly recommended that users close the session as soon as they are finished to flush any remnant data from the session.
- Enter the user's password, and click Sign In.
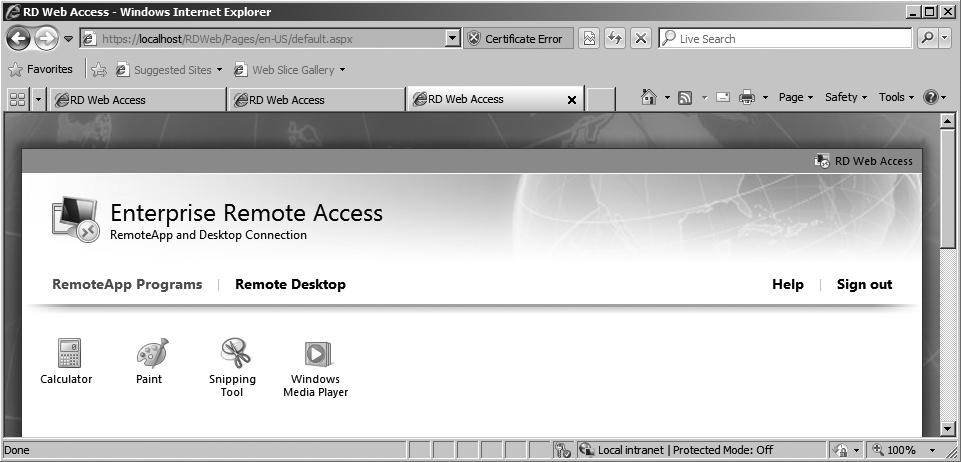
- The RemoteApp programs that have been published to the server are listed, as shown in Figure 25.14.
- Click the Paint application. A warning will appear providing a warning to the user that the RemoteApp program is starting. Click Connect.
- Enter the credentials of the same account you used to access the website, and click OK. After a moment, the credentials will be validated, and the Paint program will start.
-
If you launch Paint from the Accessories menu, you'll see there is very little difference between the local Paint program and the RemoteApp Paint program. They function the same, but the border of the RemoteApp program may be a little different.
Figure 25.14
Accessing Remote-App programs using Internet Explorer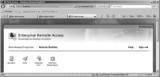
- Leave the Paint program open, and click another RemoteApp program on the web page. You'll receive the warning again, but after you click Connect, this program will launch without requiring you to enter credentials again.
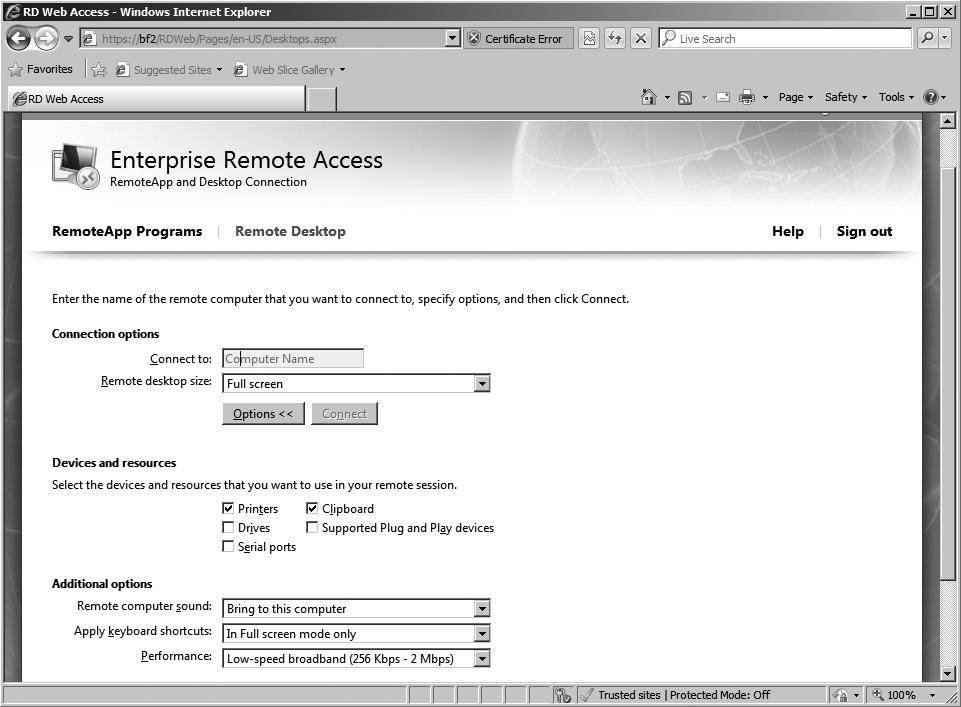
- Return to the Internet Explorer web page showing the Enterprise Remote Access menu. Click Remote Desktop.
- On the Remote Desktop page, click Options. Your display will look similar to Figure 25.15.
-
Figure 25.15
Accessing Remote Desktop options using Internet Explorer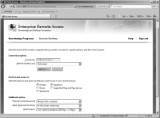
Notice that you can select many of the same options that are available in the Remote Desktop Connection tool from this page.
- Enter the name of the RD Session Host server in the Connect To box, and click Connect.
- A warning will appear as it did before. Review the information, and click Connect.
- After a moment you will be connected to a full desktop session running on the server.
- Log off the RemoteApp desktop session, and close all the RemoteApp applications.
Creating .rdp Files for RemoteApp Programs
You can use a Remote Desktop Protocol (.rdp) file to allow users to easily connect to an RD RemoteApp application. You can create the .rdp file with these steps:
- Launch the RemoteApp Manager by selecting Start ⇒ Administrative Tools ⇒ Remote Desktop Services ⇒ RemoteApp Manager.
- At the bottom of the RemoteApp Manager, you should see one or more RemoteApp programs that were added in previous steps in this chapter. You will also see a warning icon in the Digital Signature Settings area. It indicates a digital certificate has not been configured.
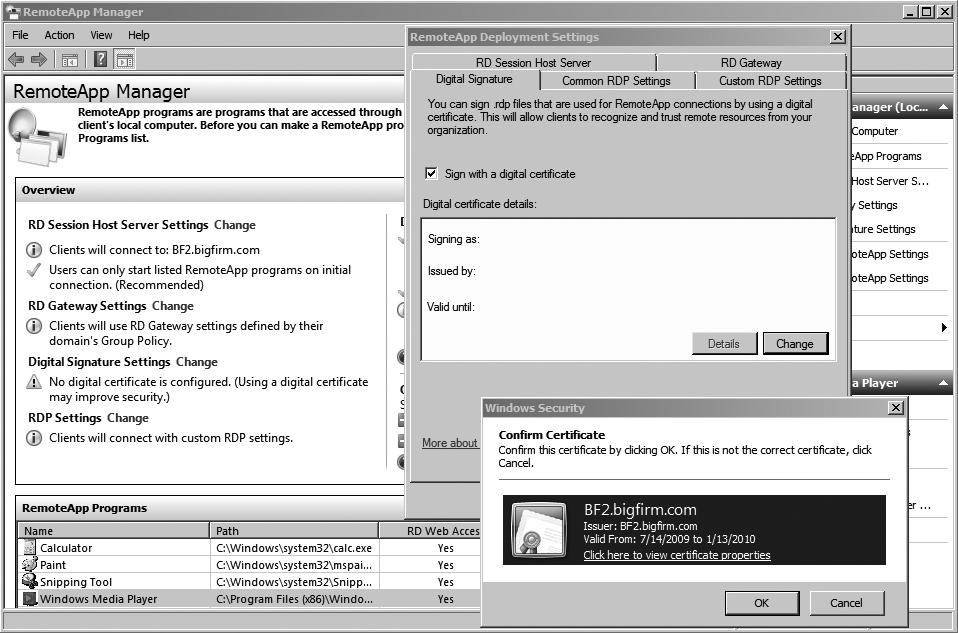
- Click Change next to Digital Signature Settings to add a digital certificate. Select the "Sign with a digital certificate" check box, and click the Change button. Your display will look similar to Figure 25.16.
-
Figure 25.16
Adding a certificate to RemoteApp Manager
Adding the certificate will allow you to sign .rdp files, which provides clients an added layer of security.
- Click OK to confirm the certificate. Click OK to close the RemoteApp Deployment Settings property page. You'll see that the warning icon on the Digital Signature Settings page will disappear.
- Locate the Paint program in the RemoteApp Program list. Right-click it, and select Create .rdp File.
- Review the information on the Welcome page, and click Next.
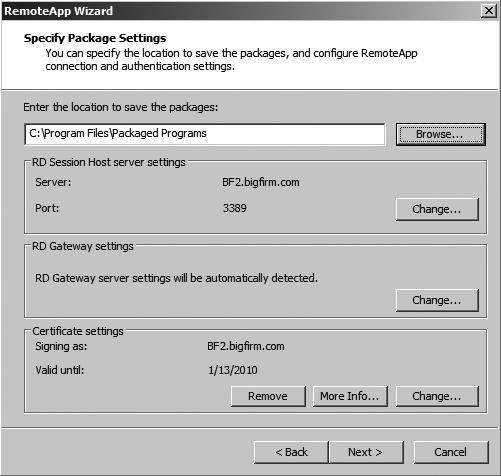
- The Specify Package Settings page will appear, as shown in Figure 25.17. You can change any of these settings, but the defaults will work for most deployments. Click Next.
-
Figure 25.17
Specifying package settings for the .rdp file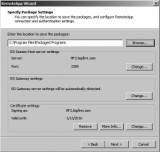
- Click Finish on the Review Settings page.
- Windows Explorer will open in the C:\Program Files\Packaged Programs folder. It will include the mspaint.rdp file.
-
This file can be copied to other computers or shared. Once it is available to other computers in the network, it can simply be double-clicked to start the application.
Launch .rdp Files Remotely
RDS doesn't seem to like it when you launch RemoteApp programs on the RemoteApp server. If you try to double-click the .rdp file on the RDS server, it may work, but often it just doesn't respond. It's best to test your .rdp files from another system within the network, even if that other system is a remote desktop launched from within your RDS server. - Copy the mspaint.rdp file to another computer in your network.
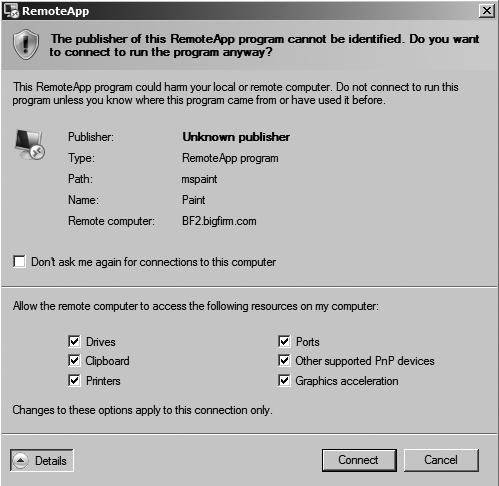
- Double-click the .rdp file on the other computer. Even though the .rdp file is signed with a certificate from the RD Session Host server, the server's certificate isn't in the trusted root authority store, so you will receive an error similar to Figure 25.18.
-
Figure 25.18
Unknown Remote-App publisher warning
If you click the Details page, you can view additional options showing what local resources will be available to the RemoteApp program. Click Connect.
- Enter the credentials of an account that is in the local Remote Desktop Users group on the RDS server, and click OK. After a moment, the credentials will be verified, the connection will be established, and the program will launch and appear on your desktop.
|
||||
At this point, you've seen how to launch a RemoteApp application using WebAccess and using an .rdp file. Once the program is launched, there isn't any difference in how it works between the two methods.
Creating Windows Installer Packages for RemoteApp Programs
Another way you can deploy RemoteApp applications is by creating a Windows Installer (.msi) file and deploying the application using the .msi file.
The big benefit of using Windows Installer files is that they can easily be deployed using Group Policy. Once the installer file has been created, you can create GPOs to assign or publish them to users and computers in your domain.
Applications installed with the Windows Installer files can be available via the Start menu and via icons placed on the desktop, depending on what you choose. Use the following steps to create a Windows Installer package for a RemoteApp application:
- Launch the RemoteApp Manager by selecting Start ⇒ Administrative Tools ⇒ Remote Desktop Services ⇒ RemoteApp Manager.
- Locate the Paint program in the RemoteApp Programs list. The Paint program was added in previous steps within this chapter. Right-click Paint, and select Create Windows Installer Package.
- Review the information on the Welcome screen, and click Next.
- The Specify Package Settings page will appear. This page is the same page that you saw when you created an .rdp file. Click Next.
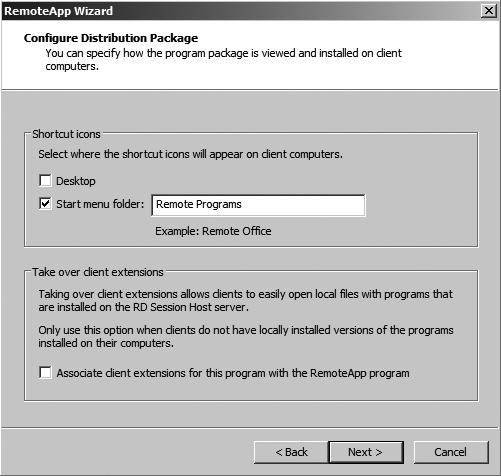
- The Configure Distribution Package page will appear, as shown in Figure 25.19. Notice that you can add shortcut icons for the program on the desktop and on the Start menu. Additionally, you can have the RemoteApp take over the client extensions. For example, if the .bmp client extension was set to launch the local Paint program, you can change it to launch the RemoteApp Paint program instead. Select the "Start menu folder" check box only, and click Next.
-
Figure 25.19
Configuring the distribution package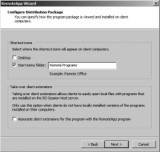
- Review your settings, and click Finish.
- Windows Explorer will open in the C:\Program Files\Packaged Programs folder. It will include the mspaint.msi file. Additionally, the mspaint.rdp file may be in the same directory from the previous set of steps.
-
You could deploy this Windows Installer file via Group Policy or by simply executing it on a computer.
This file can also be copied to other computers or shared. Once it is available to other computers in the network, it can simply be double-clicked to start the installation.
- Copy the mspaint.msi file to another computer in your network.
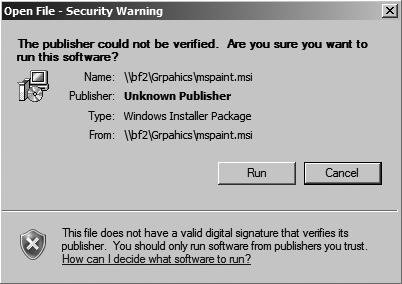
- Double-click the .msi file on the other computer. You will receive an error similar to Figure 25.20, but since you created the .msi file, you know it is safe. Click Run.
-
Figure 25.20
Windows Installer security warning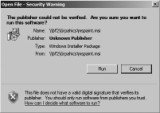
- The Windows Installer file will run and create a shortcut on the start menu. Select Start ⇒ Remote Programs ⇒ Paint.
- After a moment, the RemoteApp warning will appear because the certificate is not trusted. This is the same issue you saw with the .rdp file in the previous exercise. Click Connect.
- Enter the credentials of an account that is in the local Remote Desktop Users group on the RDS server, and click OK. After a moment, the credentials will be verified, the connection will be established, and the program will launch and appear on your desktop.
At this point, you've learned how to add the RDS role, configure the RD Session Host server, and add RemoteApp applications. You've also learned how to deploy RemoteApp programs using Web Access, .rdp files, and Windows Installer files.
Although you've learned a lot so far, there's more. You'll also want to know how to manage these services after they've been installed.
![]()
![]() Installing, Using, and Administering Remote Desktop Services
Installing, Using, and Administering Remote Desktop Services
![]() Using Remote Desktop Services for Windows Server 2008 R2
Using Remote Desktop Services for Windows Server 2008 R2
![]() Remote Desktop Services: Server and client requirements
Remote Desktop Services: Server and client requirements
![]() Adding Remote Desktop Services and RemoteApp programs
Adding Remote Desktop Services and RemoteApp programs
![]() Using Remote Desktop Services Manager, RDS CAL
Using Remote Desktop Services Manager, RDS CAL
Printed with permission from Wiley Publishing Inc. Copyright 2010. Mastering Microsoft Windows Server 2008 R2 by Mark Minasi, Darril Gibson, Aidan Finn, Wendy Henry and Byron Hynes. For more information about this title and other similar books, please visit Wiley Publishing Inc.