Hardware devices for Windows 7: Installation, management
Ease Windows 7 management by knowing the different types of hardware devices, such as internal drives, that can be installed, and how to use Windows Update for driver downloads.
Solution provider's takeaway: You should know the types of hardware devices, such as internal cards, that are necessary for a Windows 7 environment, but properly downloading and installing drives is important as well. Use this chapter excerpt to find out how to install drivers with Windows Update and learn how to use the Device Manager.
Managing Hardware Devices and Drivers
Windows 7 provides several tools and utilities for configuring and managing hardware devices and printers. You have several options for configuring devices and installing the necessary drivers. Without the proper drivers and the proper configuration, your devices will not function properly.
Warning
The combined shortcut hack appears to work on Windows 7 32-bit and 64-bit versions. It also seems to work on 32-bit versions of Windows Vista and Windows Server 2008. Many users have reported problems using it in 64- bit editions of Windows Vista and Windows Server 2008. If it crashes the system, rebooting to safe mode and removing the shortcut should solve the issues. One documented cause of the failure is that fact that Windows Vista and Windows Server 2008 have a different set of Class Identifiers (CLSIDs).
Install Devices
Installing hardware devices and drivers is much simpler in Windows 7 than in previous versions of Windows. There are several different types of hardware devices that may be installed on Windows 7 computers:
- Internal Drives – hard drives, CD drives, DVD drives, Blu-Ray drives, floppy drives, Zip drives, and any other internal drive that is released can be installed on Windows 7. These devices generally include a data cable (Integrated Drive Electronics [IDE], Serial Advanced Technology Attachment [SATA]) that attaches to the motherboard and a power cable that attaches to the power supply.
- Internal Cards – Adapters or expansion cards that are plugged into the desktops motherboard's expansion slots (Peripheral Component Interconnect Express [PCIe], Peripheral Component Interconnect [PCI], Accelerated Graphics Port [AGP]) including video cards, Redundant Array of Inexpensive Disks (RAID), and SATA controllers. Expansion cards for laptops are also considered internal cards. Generally, these cards are used to connect another device through a cable.
- External Devices – Any external device that connects to the computer through the available ports including universal serial bus (USB), IEEE- 1394 (FireWire), Line Printer Terminal (LPT), Computer Object Model (COM), and so on. These ports can be connected to printers, scanners, external hard drives, media devices, and so on through the appropriate cable.
- Memory – Memory may be added to the computer's motherboard to expand the amount of memory the computer has access to.
Windows 7 automatically detects any hardware recently installed and attempts to automatically install the driver. Additionally, after Windows 7 Setup completes, if some drivers were not installed by default, Windows 7 will attempt to find the device and respective driver. This is possible through Windows Update. This section will cover basic methods of installing hardware devices including internal and external devices, printers, wireless devices, and so on.
Install Drivers with Windows Update
Windows 7 detects hardware that was not automatically installed with Windows 7 Setup; most of the time this will occur if the Windows 7 media did not include the driver for the hardware. The built-in hardware diagnostics will, generally, detect that hardware that is installed on the computer that has no drivers are installed for it. It will attempt to identify the hardware and then use Windows Update to search for the correct driver. Windows Update will automatically download the driver but will not install it.
Open Windows Update in any of the following ways to check for new drivers or updated drivers:
- Click Start | Control Panel | System and Security | Windows Update
- Click Start | Control Panel | Windows Update
- Type windows update on Start menu Search.
- Right-click Action Center | Open Windows Update on the notification area.
- After opening Windows Update, click Check for updates on the left pane.
Essential drivers for video, sound, or hard disk controllers may appear as important updates. Other device drivers will appear in the optional updates section. Click the link on the main Windows Update console titled [X] optional updates are available, as shown in Figure 5.28.
By default, optional updates will not be selected to install. Check the box to the left of each driver you wish to install, and then click OK to download and install the update. Once the driver is installed, Windows will automatically detect the hardware device and install it.
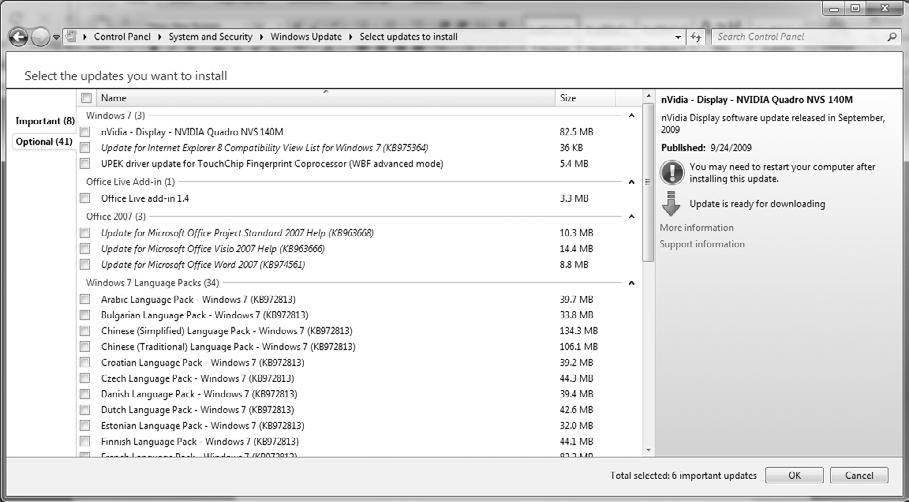
Figure 5.28: Windows Update Console – View Optional Updates Available
Device Manager
Device Manager is the central location to view, configure, and manage hardware devices. It is critical to understand how the Device Manager works before working on hardware devices.
There are multiple ways to open the Device Manager:
- In the Start menu, right-click Computer | Manage, expand Computer Management on the console tree, and then select System Tools | Device Manager.
- Enter the Start menu, right-click Computer Properties, then click Device Manager on the left pane.
- Control Panel | Device Manager
- Control Panel | Hardware and Sound | Device Manager
Notice the Device Manager is a MMC 3.0 Console. Expanding the device view is similar to any other MMC 3.0 console, simply click the arrow to the left of the device to expand the node. Devices with issues are displayed with a small symbol next to the device icon. A red X indicates the device is not installed correctly or disabled by the user or administrator. A yellow exclamation point indicates a problem with the device.
To change the view select View on the Menu bar.
- Devices by Type – This is the default view, which displays the devices by the type of hardware; devices are under the name of the device type.
- Devices by Connection – This displays devices by the connection each device is connected to.
- Resources by Type – This displays the devices by resource type. There are four resource types: direct memory access (DMA), input/output (IO), interrupt request IRQ, and memory.
- Resources by Connection – This displays the devices by the type of resource it is connected to. There are four resource types: DMA, IO, IRQ, and memory. This allows for tracing resources by the connection.
- Show Hidden Devices – This displays devices that have been removed but drivers have not been uninstalled, as well as non-plug-and- play devices.
To view options or actions for each device, either right-click the device or click on the device, and then click Action on the Menu bar. The options for each device are as follows:
- Update Driver Software – This initiates the Hardware Update wizard.
- Disable – This disables the selected driver.
- Enable – This enables the selected driver.
- Uninstall – This uninstalls the device and respective driver.
- Scan for Hardware Changes – This initiates a Windows 7 scan for new hardware devices or changes.
- Properties – This initiates the Properties window for the selected device.
Devices and Printers
The Devices and Printers applet allows you to configure devices and printers attached to your system. You can configure device properties, your default printer, and many other settings. The Devices and Printers applet gives you the ability to Add a device or Add a printer.
Add a device – Selecting this option will kick off the Add a Device wizard as seen in Figure 5.29. Windows 7 will automatically attempt to detect devices that have been added to the system. If the system cannot automatically detect the device, you will be given the option to manually add it.
Add a printer – Selecting this option will kick off the Add Printer wizard, as seen in Figure 5.30. You can use it to install a local printer, network printer, wireless printer, or Bluetooth printer.
There are two sections in the applet: Devices and Printers and Faxes.
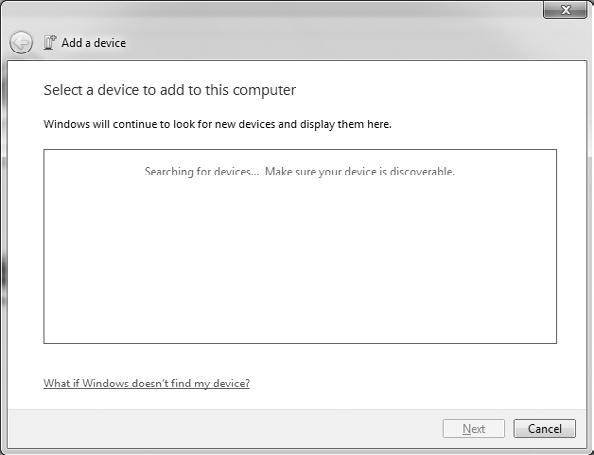
Figure 5.29: Add a Device Wizard
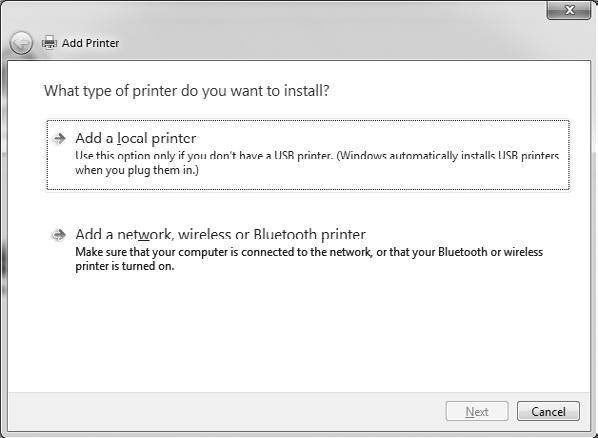
Figure 5.30: Add Printer Wizard
Devices
The Device section is used to configure devices attached to the system. The system seen in Figure 5.31 has a biometric coprocessor and an integrated camera. There is also a device listed representing the system itself. If you select the device representing the system, you get two device options:
Browse files – You can use this option to view files on the disk drives attached to the system. These could be hard drives, disk drives, or removable media.
Eject – You can use this object to remove hot-pluggable hardware and removable media.
Printers and Faxes
The Printers and Faxes section contains all of the printers connected to the system. You can configure printer properties and your default printer.
If you select one of the printers you have configured, you get four options:
See what's printing – This option allows you to view print jobs being serviced by the printer. You can view, cancel, or restart print jobs.
Manage default printers – This option will bring up the Default Printers window, as seen in Figure 5.32. The Default Printers window allows you to set an overall default printer. Or you can set a different default printer for each network your system connects to.
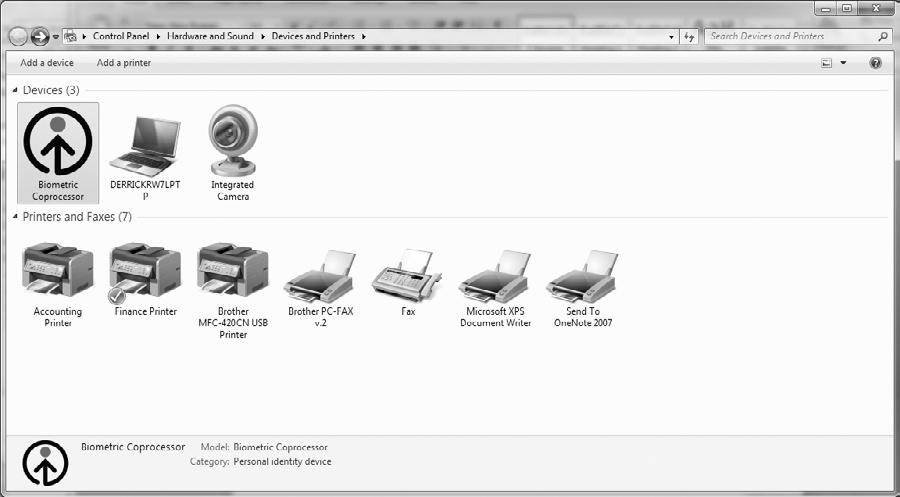
Figure 5.31: Devices and Printers Applet

Figure 5.32: Manage Default Printers Window
Print server properties – The Print server properties application allows you to configure system-wide print server properties. These print server properties are used by all printers configured on the system. You can configure printer forms that are available and configure printer ports to be used on the system. You can also add and remove printer drivers.
Remove device – This option allows you to remove a printer from the system.
![]()
![]() Managing the Windows 7 Desktop Environment
Managing the Windows 7 Desktop Environment
![]() MMC console management: Adding Windows 7 snap-ins
MMC console management: Adding Windows 7 snap-ins
![]() Hardware devices for Windows 7: Installation, management
Hardware devices for Windows 7: Installation, management
![]() Using the Disk Management MMC to manage Windows 7 disks
Using the Disk Management MMC to manage Windows 7 disks
Printed with permission from Syngress Publishing. Copyright 2010. Microsoft Windows 7 Administrator's Reference by Jorge Orchilles. For more information about this title and other similar books, please visit http://scitechconnect.elsevier.com/category/computer-security/.